Before getting started with uploading, organizing, and customizing your website; you may want to familiarize yourself with the platform itself:
Step 1 - Uploading and Managing
Step 2 - Designing your Site
- Choosing your Template and Site Design
- Customizing Your Site with Blocks
- Creating a Blog
- Edit the Site Navigation Menu
Step 3 - Finishing Touches
Step 1 – Uploading and Managing
 |
Upload Images to GalleriesUpload photos and videos through your web browser or use our Desktop Uploader. The maximum file size for videos will be 30GB and 60 minutes for the ProSuite plan, 3GB for the PortfolioPlus and Portfolio plans.
For more information about what can be uploaded, click HERE.
|
Controlling Gallery AccessBy default, every Gallery you create is private for client or guest viewing. However, you can choose to allow other visitors (open to public viewing). It is possible to also password protect your Galleries or require email addresses before viewing.
You can also determine whether or not certain actions are possible (downloading, commenting, favoriting, etc.) and who is able to perform these actions.
|
|
Sharing Your GalleriesAs mentioned, all Galleries that you create are private, until you share them with clients, guests, or potential other visitors. For sharing you have the option of sending out email invitations or copying the direct link.
You can also add Galleries to your website using Featured Gallery Blocks or just creating a new page for the Gallery.
|
|
 |
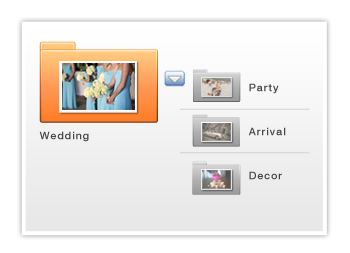
Organize Using FoldersPhotos and videos are stored in Galleries that are organized within Folders. Gallery Presets applied to the Galleries allow for an easy way to apply settings like access, downloading, etc.
|
Step 2 – Designing Your Site
Customize your website through our Block-based Website Editor. It is all done with no coding required from you. Select your website template as a starting point, choose Block to add content to your site and personalize all of the text and images present on the site.
Choosing your Template and Site DesignTemplates control the starting colors, fonts, and pages used on the site. To begin creating your website, you will be required to choose a template If you ever want to change your template, you can do so at any time without worrying about losing the custom content that you've added to the blocks on your website.
|
|
Customizing Your Site with BlocksAfter a template is selected, you can customize the Blocks that are provided or you can begin adding other Blocks to the website. Customizing your website is as easy as selecting the type of Block content you want to add. For example, if you'd like to add a contact form to your site, you can use the contact form block. Or you can use the text blocks and image blocks to add text and images to your site.
|
|
Creating a BlogFor those that are wanting to gain organic website traffic, a great way to help with this is to create a Blog with regular blog posts. With Zenfolio's blogging feature, you can create a blog for your website that will benefit your website's SEO and also provide regular interaction and content for your website visitors. The Blog feature is exclusively available for PortfolioPlus and ProSuite subscribers.
|
|
 |
Edit the Site Navigation MenuYour site's navigation menu is the main navigation tool used by your website visitors, which will appear at the very top of your website in the Navigation block.
See this article for more information about creating new pages for your site menu. |
Step 3 – Finishing Touches
Once you’ve added content and applied your design, your website may be ready for public viewing. However, there are a few finishing touches you may wish to add before inviting people to view your portfolio or look at client galleries. Here are a few suggestions.
Establish Your BrandingHaving your own logo is a way to visually brand yourself and your photography. Your logo can be displayed in the Header of your website after adding it to your account. You may also upload a Web Browser Icon (Favicon).
|
|
Get a Domain NamePurchase a custom domain name from a registrar to have a unique online presence. Pointing your custom domain name to Zenfolio is a two-step process. First, update the DNS settings at your domain registrar, then test the DNS setup in your Zenfolio account. If you've purchased your domain from GoDaddy, you can simply log into your GoDaddy domain account which will set up the DNS settings required. You’ll still need to go to your Zenfolio account's Custom Domain page and test the DNS setup for your Custom Domain.
|
|
Adding WatermarksWhile photos cannot be right-click saved or dragged to the desktop, nothing beats protection like a good watermark. Our watermarking tool allows you to upload your own watermarks or use a text watermark. These can be applied to specific photos, or entire Galleries, and set to be applied by default to any new Gallery.
|
|
Selling Print Products and MoreFor those that are subscribed to the PortfolioPlus or ProSuite plan levels, you are able to sell prints and products directly from our partnered print vendors. Also available at these account levels is the ability to sell digital downloads and self-fulfilled products.
Feel free to view our complete Selling Overview for more detailed information. |
Congrats!
You've completed the initial setup of your site! Find out what else is possible with your Zenfolio account:
Check out our blog for the latest updates and inspirations.
You can also register for a Training or Live Event.
For additional help, check out our Support Center for illustrated support articles that can show you every step in setting up and editing your site
But also feel free to contact us directly through our contact page anytime.